Every skilled plumber I’ve worked with has a small ritual before stepping into a job: a quiet inventory of tools, a quick check for sharp blades, charged batteries, and spare washers rattling in a pouch. Good work starts with the right kit, but also with knowing what to reach for and when to stop and switch tactics. If you’re a homeowner building a reliable toolkit or a new apprentice walking into a plumbing company for the first time, understanding the tools of the trade will save time, reduce call-backs, and limit damage to fixtures and finishes.
This guide brings you into the van and onto the job, tool by tool. It covers the essentials and the specialty gear, and it explains why pros choose one tool over another. You’ll get tips on materials, sizing, brands to consider without being brand-led, and where you can improvise safely. The goal isn’t to turn you into a master plumber in a single read, but to give you a working vocabulary and practical sense for what belongs in a well-stocked kit and how to use it with respect for the work.
Wrenches, grips, and the feel for torque
Wrenches are the backbone of plumbing. What separates a seasoned plumber from a frustrated do‑it‑yourselfer is not just having the right wrench, but knowing how much torque a fitting can take before it distorts or cracks.
An adjustable wrench pairs easily with a second wrench for counter‑torque. I keep an 8‑inch and a 12‑inch adjustable because they cover most faucet and supply line nuts without feeling clumsy in tight quarters. Pipe wrenches are for threaded steel or iron, or occasionally old brass that can take a bite. Keep in mind that a 14‑inch pipe wrench handles most household fittings, while a 24‑inch is for heavier work like water heater nipples or gas unions. Aluminum-bodied pipe wrenches cut fatigue when you’re overhead for long stretches, though they cost more.
Tongue‑and‑groove pliers, often called channel locks, are the workhorses for hand‑tight and slightly snug connections. They shine when you need to hold a fitting steady while the other hand turns a nut. Jaw size matters more than brand. If your pliers slip on chrome, you’re marring the finish. Switch to a strap wrench or wrap the jaws with a piece of leather.
A strap wrench belongs in any kit where you’ll see polished fittings, shower arms, or filter housings. It grips by friction, not teeth. If a strap wrench won’t budge a part, stop, reassess, and if necessary apply heat, penetrating oil, or cut and replace. For overtightened plastic fittings, especially on P‑traps and union nuts, a strap wrench with steady pressure prevents cracking.
Basin wrenches solve a special headache: the faucet nuts tucked high behind a sink. A telescoping shaft and pivoting jaw let you bite from below. Get familiar with flipping the head for tightening versus loosening by feel, because you won’t see what you’re doing nine times out of ten. When you’re working solo and a nut keeps spinning because the faucet body turns with it, wedge the faucet with a block of wood from above or have a helper hold it steady.
Cutting pipe cleanly, and why square cuts matter
Every leak you fight later can usually be traced to a cut that wasn’t square or a burr that wasn’t removed. Cutting tools vary by material, and pros pick for speed and accuracy, not just availability.
For copper, a tubing cutter with a sharp wheel gives crisp, perpendicular cuts. Small “mini” cutters are ideal under sinks or near walls where clearance is tight. Apply consistent pressure and rotate smoothly, tightening a quarter turn every cycle. Over‑tightening the cutter on the first pass can flare the tube and make fitting insertion difficult. After cutting, always ream the inside to remove the ridge left by the cutter wheel. An inside reamer or a dedicated deburring tool prevents turbulent flow and future pinhole corrosion at the cut edge.
Plastic pipe demands different tactics. Ratcheting PVC cutters work fast on schedule 40 PVC and CPVC up to about 1‑inch. For larger diameters, switch to a miter box and fine‑tooth saw, or a dedicated plastic pipe saw to keep the cut square. On cold days, PVC gets brittle; warm the pipe slightly or use a saw instead of a ratcheting cutter to avoid cracking. Deburr the inside and outside edges with a utility knife or dedicated deburrer so solvent cement doesn’t puddle.
PEX introduces its own system choices: crimp, clamp, or expansion. If you’re using crimp rings, a quality crimp tool sized for 1/2‑inch and 3/4‑inch covers most residential work. Calibration matters. Check crimp integrity with a go/no‑go gauge every few joints. For expansion PEX, the expansion tool needs good batteries and a clean, lubricated cone. Expansion fittings add inner diameter but require practice to time the expansion and insertion.
Steel or galvanized pipe, often found in older homes, calls for a reciprocating saw with a bi‑metal blade or a pipe cutter built for steel. The reciprocating saw is faster on demolition but can rattle and split threads if you’re not careful near a joint you plan to keep. Cut back to clean threads or re‑thread with a die if you need to reuse existing lines.
Soldering and brazing: heat, flux, and judgment
Soldering copper is a rite of passage. You need a torch that matches the job. A standard propane torch handles most household joints. For larger fittings or stubborn heat sinks like a valve body, a MAP‑Pro fuel cylinder delivers hotter flames and faster heat. The trade‑off is a narrow window between perfect flow and scorched flux, especially in tight wall cavities.
Flux is not optional. Use a lead‑free flux appropriate for potable water, applied sparingly. Too much flux invites internal corrosion. Cleanliness is half the battle: bright metal on both pipe and fitting with an abrasive cloth or brush, no oxidation, no fingerprints with oil. Heat the fitting more than the pipe so solder is drawn into the joint by capillary action. If solder beads and falls, you either overheated and burned the flux or you have contamination. Wipe joints with a clean rag while still warm for a professional finish and to remove residual flux.
Brazing comes up on refrigeration lines or certain high‑pressure applications, typically with an oxy‑acetylene setup or turbo torch. For most residential water lines, soft solder suffices. If a plumber suggests brazing on a domestic water run, ask why. There may be heat or pressure considerations, or material compatibility issues, particularly with bronze valves.
When soldering near finished surfaces, heat shields are your friend. Slip metal or fiberglass shields behind the work, and keep a spray bottle and fire extinguisher close. In old homes with dry framing dust, one careless flame can turn into a fire you won’t find until the smoke appears at a register.
Thread sealants, gaskets, and the myth of more torque
Any plumber can tell you a story of chasing a leak that wasn’t about torque at all. Threads seal with the right compound and contact, not sheer force.
PTFE tape, often called Teflon tape, works on tapered threads, typically NPT. Wrap clockwise as viewed from the fitting end. Two to three wraps on small fittings, three to five on larger ones, pressing the tape into the threads as you wrap. Some pros like thicker tape for gas lines, colored yellow for identification, but composition matters more than color. Avoid tape on compression fittings, flare fittings, or rubber gasket connections.
Pipe dope, or thread compound, comes in varieties rated for water, gas, steam, and temperature ranges. On older galvanized steel or in situations with slight thread imperfections, a non‑hardening compound can outperform tape alone. Many plumbers use tape plus dope on stubborn joints. The combo reduces the risk of galling and offers a belt‑and‑suspenders seal, but if you need both every time, inspect your threads for damage or dirt.
Compression fittings seal with a brass ferrule. Do not use tape or dope on the threads; they are not the sealing surface. A small dab of pipe dope on the ferrule can help it seat smoothly, but opinions vary. Once a ferrule bites, it tends to stay married to the tube. If you have to remake a compression joint, cut back to clean tubing and use a new ferrule.
Gaskets and washers, especially in traps, union connections, and faucet stems, do the sealing. A cracked or flattened washer won’t seal no matter how hard you crank. Keep assortments on hand. The difference between a fast repair and a headache is having the right 1‑1/2‑inch beveled trap washer at 8 p.m.
Drain work: traps, augers, and how not to make a mess
If you spend a week riding with a pro from a busy plumbing company, you’ll see that half the calls involve drains. The right tools save basements and reputations.
Handheld drum augers are perfect for sink and tub drains up to about 25 feet. A quality cable with a good crown tip navigates P‑traps and catches hair or sludge. If you feel a hard stop, withdraw slightly and rotate to hook the blockage rather than forcing through and packing it tighter. When the cable returns coated in greasy lint, you’re on track. Clean the cable as you retract it to keep the drum from turning into a swamp.
Power augers, or drain snakes, bring speed to long runs or stubborn clogs. They also bring risk. You can kink a cable, damage a porcelain fixture, or punch through thin wall piping if you don’t respect the torque. Keep a steady grip, feed slowly, and let the machine do the work. For toilets, a closet auger protects the bowl’s glazing and reaches past the built‑in trap. Use it before you pull the toilet or declare a line blocked.
Sometimes traps should be disassembled rather than snaked. Plastic traps come apart easily but cross‑thread just as easily when reassembled. Hand‑tighten, then a slight nudge with pliers if needed, and test for leaks with a full sink of water. Wipe all fittings dry before you test so you can see fresh leaks.
Chemical drain cleaners are tempting for homeowners. A plumber will usually avoid them unless necessary, because they can damage pipes and create a hazard for whoever opens the trap next. If you do use one, disclose it to anyone who works on the line later. The residual chemical stays active.
Water supply: valves, lines, and pressure realities
Valves are the difference between a controlled repair and an indoor fountain. Ball valves have largely replaced gate valves for good reason. A quarter‑turn ball valve gives a clear open or closed position and ages better. If a gate valve is sticky, don’t force it. You can break the stem and be left with a valve that spins freely without shutting off flow. Replace old gate valves when you have the chance, preferably during planned work, not an emergency.
Supply lines for faucets and toilets come in braided stainless, copper, or PEX. Braided stainless, properly sized, is forgiving and fast. Replace them during fixture changes as cheap insurance. Copper risers look clean and hold shape, but require precise cuts and compression fittings to avoid leaks. If you have a fridge or ice maker line, consider a braided stainless line with a metal ferrule rather than soft plastic tubing. A ruptured plastic line can run for hours before anyone notices, and the damage dwarfs the cost of an upgraded line.
Water pressure varies by neighborhood and building height. Anything consistently over about 80 psi stresses fixtures and hoses. A simple gauge on an outdoor spigot tells you where you stand. If pressure spikes, install or service a pressure reducing valve and ensure a thermal expansion tank is sized and pre‑charged correctly. Too many callbacks stem from water hammer noise or premature fixture failures caused by ignored pressure issues.
Joining methods beyond solder: press, push‑fit, and solvent welding
Modern systems offer alternatives to flame. Press fittings for copper use a battery‑powered tool that crimps specialized fittings. They are fast, clean, and ideal in tight spaces or near combustible materials. The cost of the tool is high, which is why they are more common with a plumbing company that can spread the investment across crews. A common mistake is failing to deburr the pipe. Press systems rely on smooth pipe ends to protect O‑rings. Mark insertion depth with a pen before pressing so you know the pipe didn’t back out.
Push‑fit fittings like SharkBite have their place, especially for temporary fixes, testing, or tricky transitions. They’re code‑approved in many areas, but long‑term reliability depends on clean cuts, proper insertion depth, and restraint against stress. Use a depth tool, and after insertion, tug firmly to confirm engagement. For permanent work, many plumbers prefer crimped PEX or soldered copper, but push‑fit shines in emergencies.
Solvent welding for PVC and CPVC uses primer and cement. The primer softens and cleans the surface; the cement fuses the joint. Skip the primer and you’re gambling. In cold weather, cure times stretch, and joints that look fine will leak under pressure hours later. Make sure to quarter‑turn the pipe as you assemble to spread cement evenly, then hold for several seconds as the joint sets, or the parts can push back apart.
Measuring, marking, and inspecting
Measure twice, cut once is trite because it is true. A reliable tape measure, a fine‑tip marker that writes on wet pipe, and a torpedo level help bring order to busy mechanical spaces. A good headlamp is not optional in crawlspaces. If you’ve ever tried to solder by the light of your phone, you learn fast.
Inspection mirrors and a compact borescope camera are worth their weight when you need to see behind a tub or inside a wall cavity. A simple mirror on a telescoping wand identifies leaks running down the backside of a fitting without cutting more access than necessary. Moisture meters and thermal cameras can confirm hidden leaks, but use judgment. Water can travel along framing and mislead you.
Safety gear: hands, eyes, lungs
A plumber’s hands take a beating. Nitrile‑coated gloves provide grip when wet and resist cuts. Keep thicker gloves for drain work and light leather for carrying and demolition. Safety glasses are a must when cutting or snaking. A soldering job overhead without eye protection is an eye doctor visit waiting to happen. For solvent and primer, ventilate and consider a respirator when working in small spaces. Kneepads don’t get enough respect until your knees start to complain. Long days on concrete translate into long nights with ice packs.
Specialty tools that pay their way
Every pro has tools that feel like indulgences until they save an hour on a job.
A cordless oscillating multi‑tool trims access panels, undercuts casing for pipe runs, and slices copper clamps in cramped quarters. With a bi‑metal blade, it can cut a seized screw without disturbing tile. A compact right‑angle drill with self‑feeding bits bores studs for PEX or copper neatly and fast. Keep an eye on hole locations to avoid weakening joists.
Pressure test pumps, manual or battery, let you proof a system before closing walls. A 20‑minute pressure hold can flush out weaknesses that would become invisible once drywall is back. For gas lines, manometers beat guesswork. Soapy water finds bubbles, but a pressure drop measured in inches of water column tells you the whole story.
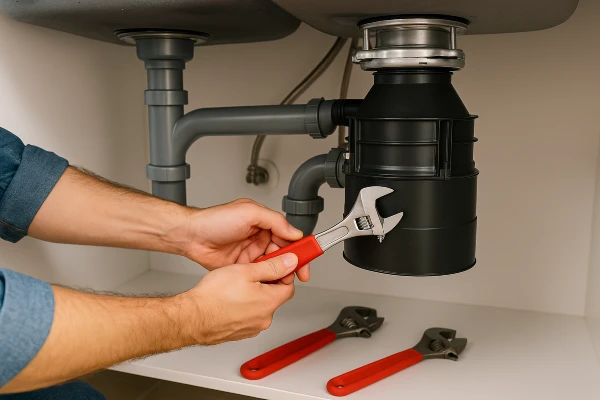
For fixture installs, a faucet and sink installer tool, essentially a specialized wrench for mounting nuts and supply lines, reduces knuckle scraping under sinks. It looks gimmicky until you try to tighten a deep, plastic mounting nut behind a double bowl.
Real‑world choices: what to buy first, what to borrow, and what to rent
Tool budgets are real, especially when you’re getting started. Focus on versatile essentials, then add specialty tools as your jobs demand.
Here is a compact starter checklist that covers most service calls without weighing you down:
- 8‑inch and 12‑inch adjustable wrenches, a 14‑inch pipe wrench, and tongue‑and‑groove pliers Tubing cutter with reamer, ratcheting PVC cutter, and a fine‑tooth saw Basin wrench, strap wrench, and a compact multi‑bit screwdriver set Torch with appropriate fuel, lead‑free solder, potable‑water flux, PTFE tape, and thread compound Handheld drum auger, closet auger, and a small reciprocating saw with bi‑metal blades
Rent or borrow power drain machines until the volume of drain work justifies ownership. The same goes for copper press tools. If your plumbing company runs crews on commercial or multi‑unit buildings, press tools make sense. For solo residential service, they are a luxury until the jobs pay for them.
Care, calibration, and knowing when a tool is lying to you
Tools drift. Crimp tools for PEX go out of calibration. Torque memory on your wrist isn’t precise, and winter cold changes how plastics behave. Build habits. Check your PEX crimper with a gauge after a dozen crimps or a rough day. Replace cutter wheels and saw blades before they force you into bad technique. Clean torch tips. Oil pipe wrench pivots so jaw teeth bite cleanly. A dull blade or a sticky jaw creates more broken fittings than clumsy hands do.
Batteries deserve respect. Label your packs and rotate them so they all age together. Cold saps performance, heat kills lifespan. Keep a 12‑volt compact drill for pilot holes and tight spaces, and a heavier 18‑ or 20‑volt for larger holes and hole saws. When a cordless tool starts to bog, stop. Forcing a dull hole saw through a stud heats the bit, burns the wood, and risks hitting a hidden cable or pipe because you lose feel.
Material compatibility and corrosion traps
Mixing metals invites trouble. Copper to galvanized steel creates a galvanic cell that eats the less noble metal, usually the steel. Use dielectric unions or approved transition fittings. On water heaters, dielectrics are common, but check that the union is not just decorative. On threaded joints outdoors or in corrosive atmospheres, a corrosion‑resistant compound helps, but nothing replaces proper isolation.
Brass and copper play well together. Stainless steel with brass is usually fine, but if you see bluish staining or rapid deterioration on stainless braided supply lines, investigate water chemistry. Hard well water with high chlorides can attack stainless braid over time. In those conditions, plan replacement intervals rather than waiting for failure.
Troubleshooting with tools: quick scenarios
A bathroom sink faucet wobbles after installation. Before you assume a defective faucet, reach for the basin wrench and check the mounting nut again, but also look for a compressed foam gasket that never seated. A thin bead of plumber’s putty under the base or a switch to the provided rubber gasket, depending on manufacturer instructions, usually stabilizes the faucet. Over‑tightening can warp a thin stainless sink deck.
A P‑trap keeps leaking even after replacing the washer. Look for misalignment between wall pipe and tailpiece. Hand‑tightened slip joints tolerate only small misalignments. A short extension or adjustable tailpiece gives you more flexibility. Lubricate the washer with a touch of liquid soap to help it seat.
A copper joint weeps after cooling. Reheat and add solder is a common instinct, but if the joint is contaminated or the solder has skinned over, you’ll chase it in circles. Wick out the old solder with a dry rag while hot, let it cool, clean aggressively, reflux, and re‑solder. If there’s water in the line, even a drip, it will kill the joint. Use a pipe plug, bread trick for a short run, or a freeze kit if you must keep a section live.
Working smarter with layout and access
Neat work is not just aesthetic. Lines that run plumb and level avoid stress on joints and telegraph quality to the next tech who sees the job. Use pipe clamps and nail plates where pipes pass through studs near wall surfaces. Keep hot on the left, cold on the right, and valves accessible. If a valve ends up behind an immovable object, you’ve created future drywall dust for someone.
When cutting access in finished spaces, aim for panels rather than random holes. A 10 by 14 inch panel behind a tub gives future access to valves and traps. An oscillating tool helps keep cuts clean. If you https://theleanderplumber-company.com must open tile, plan cuts along grout lines and protect edges with tape.
When to call a pro and what to expect from one
There’s pride in doing your own work, but certain situations justify a licensed plumber. Gas lines, main shutoff replacements, water heater flues, and sewer main backups involve safety and code implications. A good plumber brings not only tools but pattern recognition. They see a stain on a ceiling and think of a shower valve that wasn’t properly sealed around the escutcheon, or a pinhole leak on a hot line caused by a near‑ground strap.
When you hire a plumbing company, ask about warranty on labor, response time, and whether they stock common parts on the truck. A tech who has to leave three times for parts turns an hour job into a day. Many companies run flat‑rate pricing. That can be fair if the tech is prepared and the scope is clear. Communicate symptoms, prior work, and materials in place. Mention if chemical drain cleaners were used. Those small details guide tool choices before anyone lifts a wrench.
Building your kit over time
Start with strong basics and add as your work broadens. Over a year, the pattern of your jobs will tell you where to invest. If you do a lot of old house work, pick up a compact borescope and a set of internal pipe extractors for broken nipples. If new construction dominates, hole saw sets, right‑angle drills, and press tools rise in value.
A simple maintenance rhythm keeps your investment paying back. Wipe tools clean after drain work. Oil moving parts lightly. Replace consumables before they become a problem. Label cases and keep logical organization so you can find a strap wrench in the dark. Your future self, on a Saturday evening when a water heater relief valve decides to seep, will be grateful.
Here is a brief maintenance routine that fits into the end of any service call:
- Check cutting edges and replace or rotate dull blades and wheels Wipe and oil wrenches, pliers pivots, and torch threads Verify PEX crimp tool calibration with a gauge Restock washers, PTFE tape, flux, and common fittings from your van inventory Put batteries on charge, rotate packs, and log any tool acting strangely
The best plumbing tools are the ones you know intimately. They extend your hands, sharpen your judgment, and make the difference between a repair that holds for a decade and one that calls you back next week. Whether you are a homeowner with a small set or an apprentice loading a new bag, choose tools that fit your work, care for them, and learn the little cues they give you. That’s how pros work, and it’s how you’ll get there too.
THE LEANDER PLUMBER - COMPANY 1789 S Bagdad Rd #103, Leander, TX 78641 (737) 530-8021